

Animating View Properties in Xcode with Swift 4 and Auto Layout
Animating View Properties in Xcode with Swift 4 and Auto Layout
One way to make your iOS applications more interactive is by adding awesome view animations. They always look cool and are surprisingly easy to accomplish.
Tools You’ll Need
To be able to follow along with this tutorial, there are a couple of prerequisites before we start. You will need:
- A Mac running the latest point release of macOS X Sierra or later.
- Xcode 8 or later.
- Basic knowledge of the Swift 4 language and Auto Layout.
Getting Started
Now that we have what we’ll need, let’s get to work. I’ve already set up a small project for us to work on.
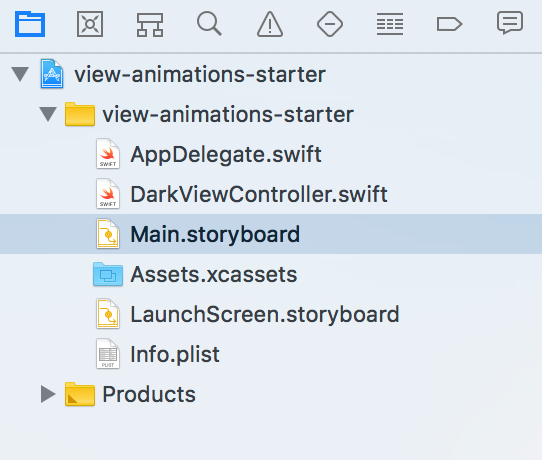
Open Main.storyboard where you’ll see DarkViewController that is composed of a UIView centered in the view controller and an Animate button way down at the bottom with enough space to let the UIView do its thing.
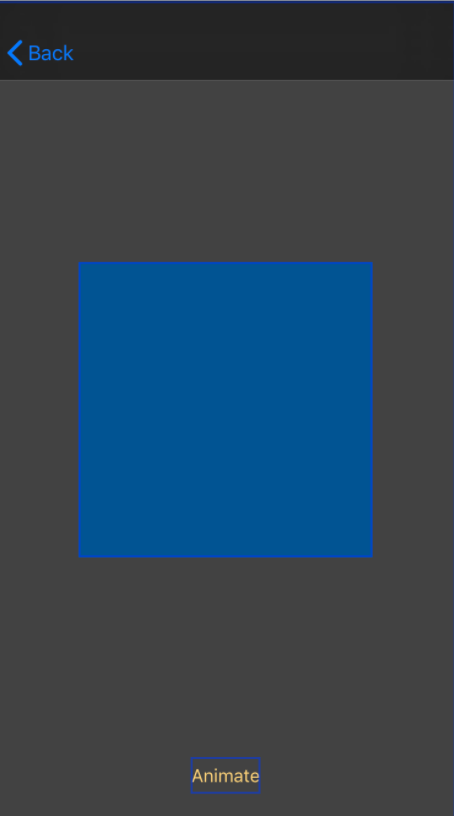
Run the project to see how the “awesome” design looks in action. We will be using this ViewController to demonstrate animating view properties.
Animating View Properties
Before we get down to the animating business, let’s cover a bit of theory.
There are three categories of animatable view properties:
Position & Size consists of the bounds, frame and centre of a view. Changing these properties will have obvious conflicts with autolayout.
Appearance consists of the background color and alpha of a view.
Transformation consists of rotation, scale, and translation. This comes from the CoreGraphics API, which will not be covered in this tutorial.
Note: When animating position and size properties, as soon as the animation completes, Auto Layout will recalculate the constraints and the view will snap back to its original position. Auto Layout, however, won’t be a problem if you’re planning to remove the view from its superview or if you also create an animation to return the view back to its origin.
The first thing we have to do is to connect our views to the Swift file.
Open Main.storyboard, select the Dark View Controller and click on the Assistant Editor in the top right section of Xcode. The one that looks like two overlapping circles.
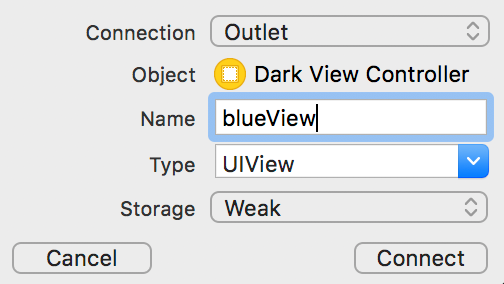
The first thing we want to connect is our UIView, and the easiest way to connect it would be from the Document Outline on the left.
From there, you can either Option + drag or right-click drag to the DarkViewController.swift file just above the viewDidLoad method.

Name the view blueView and hit connect.
Next, connect the Animate button below the viewDidLoad() method.
Make sure it is an Action of type UIButton.

Once you’ve done that, let’s start animating a basic property like appearance. To do that, we have to request the help of our resident Animation API that the good folks at Apple have been so kind as to provide for us.
In the animate(sender: ) method, if you start to type UIView.animate, the Xcode autocomplete will give you a few options.
- The first provides an animation implementation with a duration and an animations closure.
- The second adds a completion closure to the first one in case you need to do something after the animation completes.
- The third offers the additional option of a delay as well as animation options. This is the one we are going to use. Go ahead and select it.
Note: You can dive deeper into understanding the Animation API in my post concerning Constraint Animations.
Animating Appearance
Let’s start with animating the color and alpha values of our blueView.
Fill in the parameters with the following values:
UIView.animate(withDuration: 1.0,
delay: 0.0,
options: [],
animations: {
self.blueView.backgroundColor = .yellow
},
completion: nil)
Build and run the project and then click the animate button.
Now let’s play with the alpha, which is the opacity of the view. The alpha value ranges between one being fully opaque and zero being invisible.
Under the line that changes the blueView’s background color to yellow, let’s be extreme and change the alpha to zero.
self.blueView.alpha = 0
Build and run the project and notice how the view changes color to yellow and then completely disappears from view.
Animating Position and Size
Okay, now we’re done with the boring animations so let’s get to the fun stuff and animate the blueView to be a bit smaller.
Comment out the code that makes the alpha zero because there’s no point in making the blueView smaller if we can’t see it. We can also change the shape of the blueView by reducing the height more than the width. Add the following code under the line we just commented out:
self.blueView.frame.size.width -= 80
self.blueView.frame.size.height -= 169
Not too bad, right? Next, let’s move the view a bit to the right. Beneath the code you just wrote, add:
self.blueView.frame.origin.x += 120
Notice now that the blueView changes color to yellow, shrinks up, and moves to the right.
Next let’s make our blueView move around the screen. We want to make it shrink up, go to the top left corner, go right, and then move back to its original position.
Comment out the code that moves the blueView by 120 points to the right. Then add the following code to move the blueView to the top left corner of the screen.
self.blueView.frame.origin.x -= 50
self.blueView.frame.origin.y -= 150
At this moment, if you try to move the blueView to, say, the top right corner, it will simply animate from the original position to the top right. An animation on a single property, like position, will only focus on the start and the final destination.
If you want to chain animations, there are two ways you can go about it:
Create a large animation by using smaller animations called keyframes.
Add another animation method in the completion: closure of the first one.
Keyframe animations will not be covered in this tutorial. We will, however, implement the latter option.
Add the following animate method in the completion: closure of the first method:
completion: { _ in
UIView.animate(withDuration: 1.0,
delay: 0.0,
options: [],
animations: {
self.blueView.frame.origin.x += 170
},
completion: nil)

}
The blueView now animates to the top left corner of the screen and then animates to the top right corner as intended. Our animation is coming along quite nicely.
Next, let’s add one more method to animate the blueView back to its original size and position. We’ll nest this one, as you might have guessed, inside the completion: closure of the second animate method:
completion: { _ in

UIView.animate(withDuration: 1.0,
delay: 0.0,
options: [],
animations: {

self.blueView.frame.origin.x -= 120
self.blueView.frame.origin.y += 150

self.blueView.frame.size.width += 80
self.blueView.frame.size.height += 169
},
completion: nil)
}
Your animate(sender: ) action method should now look like this:
@IBAction func animate(_ sender: UIButton) {

UIView.animate(withDuration: 1.0,
delay: 0.0,
options: [],
animations: {

self.blueView.backgroundColor = .yellow
//self.blueView.alpha = 0.0
self.blueView.frame.size.width -= 80
self.blueView.frame.size.height -= 169

//self.blueView.frame.origin.x += 120
self.blueView.frame.origin.x -= 50
self.blueView.frame.origin.y -= 150
},
completion: { _ in

UIView.animate(withDuration: 1.0,
delay: 0.0,
options: [],
animations: {

self.blueView.frame.origin.x += 170
},
completion: { _ in

UIView.animate(withDuration: 1.0,
delay: 0.0,
options: [],
animations: {

self.blueView.frame.origin.x -= 120
self.blueView.frame.origin.y += 150

self.blueView.frame.size.width += 80
self.blueView.frame.size.height += 169
},
completion: nil)
})

})
}
Run the project for the last time to view your completed work of art. It should look something like this.

