Option-1
Go to windows-> Avd Manager . Select your AVD and edit it and add keyboard support under Hardware section . Make its boolean value true and Enjoy typing with PC’s keyboard.

Option-2
For those who are using Android Studio.
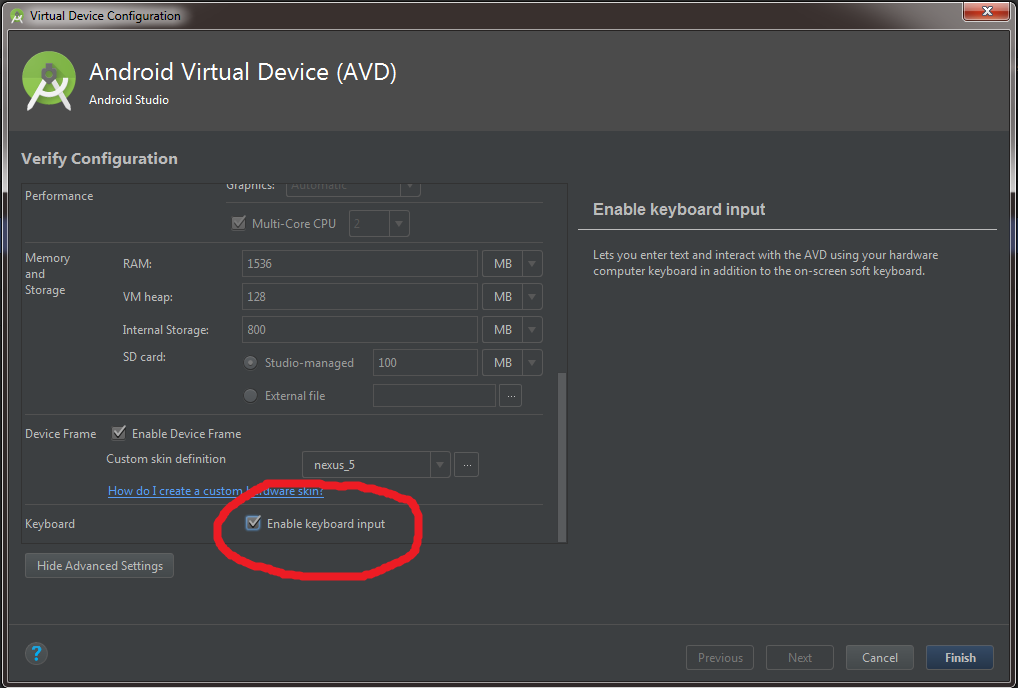
Open Android Virtual Device Manager.
Click the ‘Pencil icon’ align with the selected Emulator.
(A dialog will popup) Select Show Advance Settings button.
Find ‘Enable Keyboard Input’ and ensure it’s selected. enter image description here
5 Finally Click ‘Finish’ and you’re done!
Option-3
Open AVD Manager > Click on your target AVD > Edit > Hardware > new > Key board Support > Ok > make it yes > and try now
Android Studio -> Tools -> Android -> AVD Manager -> Will show list of Virtual devices Edit(pencil icon) of device you want to update settings ->Show Advanced Settings -> Keyboard -> Check Enable Keyboard Input ->Finish.
Android Studio > AVD Manager > Edit > Show Advanced Settings > Enable Keyboard input > Finish
Option-4
Eclipse > Window menu > AVD Manager
Select your virtual device and click Edit
Under Hardware, Click New
Select Keyboard Support then click OK
Edit its value to yes
Now you have to click off onto another item in the list, like “Abtract LCD Density” or something. This seems to make the UI keep the “yes” change.
My other AVDs that don’t have this “keyboard support” hardware property added do NOT accept my physical keyboard input.