Creating the Hello World iOS App using SWIFT !
So, when you first load Xcode, assuming you haven’t turned it off in the preferences, you will see the “Welcome to Xcode” screen. To start a new app, you click the appropriately titled “Create a new Xcode project” button. If you have hidden this page, or prefer using menus, you can create a new project via “File → New → Project…”.

After you click that, you are shown the template screen. You have many choices built in here, which will start you off with an Xcode project that is preconfigured as whichever one you select. For us though, let’s choose the simplest one, the “Single View Application”.
Next, you are presented with the page to set many of the important aspects of your project, particularly your “Product Name” and “Language”, which will be Swift, of course
Product Name is pretty self-explanatory. The organization name can be whatever you want, but it probably should the the company or name you are releasing your apps under.
The Organization Identifier is part of how your app will be referred to a bit more internally. It is customary to use a reverse domain name of your company as the Organization identifier, so in my case my normal URL of “mycodetips.com” should become “com.mycodetips”. You can see below it that the “Bundle Identifier” is created based on the product name and the organization identifier. This is part of how your iOS device determines whether an update to your app is the same app or a new one, by checking this Bundle Identifier.
The Language box gives you the choice of Objective-C or Swift. we’ll be choosing Swift for this box. The next box has you select what devices this app should run on. You have the choice of iPhone, iPad, or Universal. Apple is heading more in the way of universal apps, so we’ll go with that for now (though this app will be designed for an iPhone, so it will look a bit silly on an iPad). Finally you can click that checkbox if you want Xcode to get some Core Data code ready for you. I don’t know enough about Core Data yet to really recommend whether or not to use this checkbox when using core data. It would probably be best in the beginning at least not to, if only to let you see all of the moving parts of Core Data by having to set them up yourself.
When you click next, you will be presented with a save dialog, asking where you want to save your project. Wherever you save it, a folder will be created with your app’s name, and inside will be the Xcode project, and a folder for each target your app has (which is going to be the app itself, and a test target right now). You also have the option to create a Git repository for your project either locally or on a server.
After you click the “Create” button, the files for your project are generated and you are probably looking at your AppDelegate.swift file.
Setting up the Storyboard
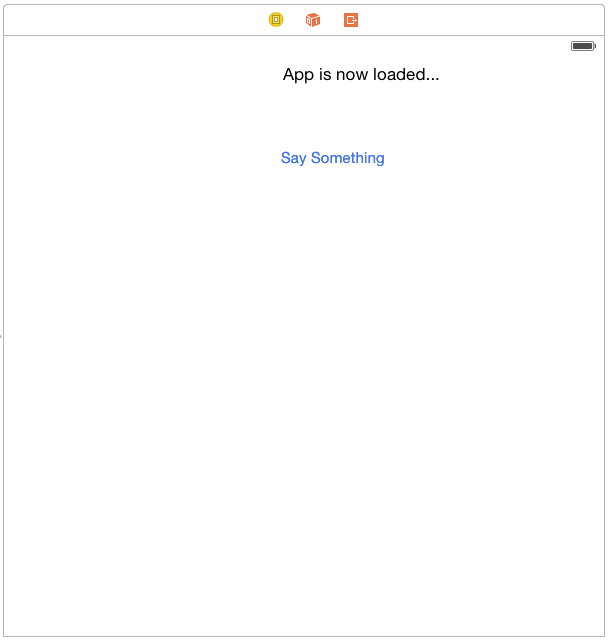
Now we’ll set up the storyboard. This app will present the user with a UILabel and a UIButton. When the UIButton is tapped, “Hello World!” will show up in the UILabel.
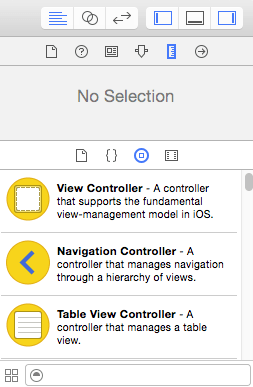
Make sure that you are showing the Utility Pane on the right side. With that open, on the bottom of the Utility pane, make sure you have the Object Library shown, which is done by having the buttons selected that looks like the original iPhone home button.
Inside the Object Library, we will drag out a UILabel and a UIButton onto the storyboard. Let’s have these two objects be horizontally centered. Place them roughly where you want them to be using the guidelines the Xcode shows when you are near the margins or center.

Set Object Locations with Auto Layout
We’re going to use size-classes and Auto Layout in this app to make it universal, so we’ll need to set up someAuto Layout constraints. Don’t worry, it’s pretty easy for this app. We won’t specialize size-classes for Compact vs Regular for now though, so it will look a bit silly on an iPad.
Customizing ViewController.swift
Now we need to wire up the UILabel and the UIButton to be accessible in the code. We’ll need to wire up an outlet to the UILabel, and an action to the UIButton.
@IBAction func saySomethingTapped(sender: UIButton)

{
displayLabel.text = "Hello World!"
}
import UIKit

class ViewController: UIViewController {

@IBOutlet weak var displayLabel: UILabel!

@IBAction func saySomethingTapped(sender: UIButton) {
displayLabel.text = "Hello World!"
}

override func viewDidLoad() {
super.viewDidLoad()
// Do any additional setup after loading the view, typically from a nib.
}

override func didReceiveMemoryWarning() {
super.didReceiveMemoryWarning()
// Dispose of any resources that can be recreated.
}

}

Running the App
So now you run the app with the big “Play” button in the top left of Xcode. You then need to set what device to run the app on. You can select a physical device (if you have a paid developer license). Otherwise, or even just for simpler testing, you can run it in the simulator. Choose the simulated device to run it on from the same menu.